How to Register Multiple Gutenberg Blocks Each Through its Own block.json File
As I recently faced the lack of information on how to register two or more Gutenberg blocks by means of block.json configuration files, I thought I'd share what I learnt while experimenting on my own.
The development of a block-enabled plugin is a very well documented process in the WordPress Codex, packed with all the information one might need to get started. To date however, the documentation falls quite short in providing details on how a plugin should proceed to register two or more Gutenberg blocks by means of block.json configuration files. As I recently faced this problem first-hand, I thought I'd share what I learnt.
I am of the idea that the best way to transfer knowledge is doing it by examples, thus what I am going to do is to walk you through the development of a non-standard block-enabled plugin by the name of Multiblock. The plugin will register two sample blocks, each of which will show an "Hello" message both in the Gutenberg editor and in the front of the website. As the aim of the post is to show you how to use multiple block.json configuration files in the same plugin, I invite you to peruse the Block Editor Handbook in the WordPress Codex for a comprehensive explanation on how to develop Gutenberg Blocks.
To follow along with this post, apart from a development installation of WordPress, you will need Node.js, and so npm, installed on your computer. My development environment is based upon macOS, so what follows is intended from a macOS development perspective.
Summary of the Necessary Steps
If you want to read the whole post at a later time, or you like better to go straight to the kernel of the how-to which follows this informational section, the one below is the summary of the steps needed to allow a block-enabled plugin to register multiple Gutenberg Blocks:
- Your plugin must bundle as many custom
block.jsonfiles as there are Gutenberg Blocks to register, by taking into account that the filename of customblock.jsonfiles must necessarily end with block.json and that only one configuration file in a set ofblock.jsonfiles should include information about the paths of the final JavaScript and stylesheets — such files are those that will be automatically placed into thebuildsubfolder by thebuildscript. - For each Block, you may need to create a pair of "Edit" and "Save" components, each one saved to its own file. Eventually, you may also need to create a distinct stylesheet for each "Edit" component.
- The
src/index.jsmust contain a distinct call toregisterBlockType()for each Block. - The main
.phpfile of your plugin must register each Block using the metadata stored into your customblock.jsonfiles. This is achieved by placing inside a callback of theinitAction Hook as manyregister_block_type( 'path-to/custom-block.js' )calls as there are Blocks to register.
At the time of writing, WordPress 5.9.1 is the latest stable release the development team has made available to the world.
Setting up a Block-enabled Plugin
To get the ground ready for development, we are going to use the @wordpress/create-block Node package:
-
Open the Terminal application and navigate with the
cdcommand to thewp-content/pluginsfolder of you local installation of WordPress. -
Then, generate the base files of our plugin by executing this command:
1$ npx @wordpress/create-block multiblockAfter you hit
enteryou might be prompted to instal the aforementioned package. If so, go ahead with installing it.
Before we can start tinkering with the code, we first have to make a few changes to the structure of the plugin just generated.
The Structure of a Multi-block Plugin
When you'll reach the end of this post, Multiblock will be made up of the following list of files:
1+ multiblock
2 + build
3 index.asset.php
4 index.css
5 index.js
6 style-index.css
7 + config
8 one-block.json
9 two-block.json
10 + src
11 index.js
12 style.scss
13 OneEdit.js
14 OneEdit.scss
15 OneSave.js
16 TwoEdit.js
17 TwoEdit.scss
18 TwoSave.js
19 - .editorconfig
20 - .gitignore
21 - multiblock.php
22 - package-lock.json
23 - package.json
24 - readme.txtA multi-block plugin like Multiblock has to bundle as many block.json files as there are Gutenberg Blocks to register. It is usually convenient to group all these configuration files in a subfolder, thus create a new folder in the multiblock directory and name it config.
With regard to our sample plugin, the content of our block.json files will be very much alike to the content of the default src/block.json file generated by the @wordpress/create-block package. In order to be concise, we are going to register just two Blocks. We can create the configuration file for our first Block by moving src/block.json to the config subdirectory and renaming the file as one-block.json — we will name the two Blocks One and Two respectively.
The filename of custom
block.jsonfiles must necessarily end with 'block.json', for WordPress to load them flawlessly.
Our one-block.json needs some customisation. At the very least we have to update the name and title properties. So please, update their values to one/multiblock and Multiblock - One respectively. Also, we must tell WordPress that the final .js and .css files needed by the front-end to display, control and style our Block 'One' will be packed in the build folder, so update one-block.json with the following key-value pairs:
1{
2 // ....
3 "editorScript": "file:../build/index.js",
4 "editorStyle": "file:../build/index.css",
5 "style": "file:../build/style-index.css"
6}config/two-block.json, the configuration file for Block 'Two', is mostly a copy of one-block.json where the occurrences of the word one have been replaced with the word two by making sure to preserve their capitalisation. However there is a but: since only one configuration file in a set of block.json files should include information about the paths of the final script and stylesheets, our two configuration files actually have very distinct characteristics. The reason for this is that we have to tell WordPress to load only once the files in the build folder.
So, after having duplicated one-block.json, renamed its copy as two-block.json and replaced the occurrences of the word one with the word two by preserving their capitalisation, you have to delete from two-block.json the final three properties: editorScript, editorStyle and style.
We are done with the configuration files. Now, as each Block generally has its own set of "Edit" and "Save" components inhabiting the src subdirectory, it's time to actually write some code!
Let's Populate the 'src' Subfolder!
The src subfolder is where our custom code goes. It will contain the following files:
- index.js: the starting point of the React-powered part of our sample plugin. Here will go the calls to the
registerBlockType()function. - style.scss: the stylesheet imported by
src/index.js. It will contain the CSS to control the appearance of our Blocks both in the Gutenberg Editor and in the front of the website. - An "Edit.js" and an "Edit.scss" file for each of our two Blocks. They will contain respectively the "Edit" component (it controls the Block in the editor) and its CSS style rules (applied only to the markup in the editor).
- A "Save.js" file for each of our two Blocks. It will contain the "Save" component, the component that controls the markup of a Block in the front of the website.
Before we proceed with filling up the files listed above with the necessary code, you have to clean up the src folder of all the files we will not use, so please, delete all the default files but src/index.js and src/style.scss.
Now create the file src/OneEdit.js — it contains the "Edit" component that we will register for Block 'One':
1import { __ } from '@wordpress/i18n';
2import { useBlockProps } from '@wordpress/block-editor';
3
4import './OneEdit.scss';
5
6export default function OneEdit() {
7 return (
8 <p {...useBlockProps()}>
9 {__( "Multiblock – hello from the editor, I'm One!", 'multiblock' )}
10 </p>
11 );
12}As you can notice, among the imports, there is also the import instruction for the src/OneEdit.scss file. As said before, this file contains the CSS rules applied to the markup showing up in the Gutenberg editor. Its content is minimal:
1.wp-block-one-multiblock {
2 color: #00ff73;
3}The last file needed by Block 'One' is src/OneSave.js, so we have to create it and populate it with this code:
1import { __ } from '@wordpress/i18n';
2import { useBlockProps } from '@wordpress/block-editor';
3
4export default function OneSave() {
5 return (
6 <p {...useBlockProps.save()}>
7 {__( "Multiblock – hello from the saved content, I'm One!", 'multiblock' )}
8 </p>
9 );
10}The files we need for Block 'Two' can be obtained from the three files just created for Block 'One' by just duplicating them and replacing the occurrences of the word 'one' with the word 'two' both in the files' name and content. To differentiate a bit how the two Blocks look like in the editor, we can change the text colour of Block 'Two' for instance. To do so, just write the following in src/TwoEdit.scss:
1.wp-block-two-multiblock {
2 color: #fbff00;
3}The 'src/index.js' File
Finally, in src/index.js we have to import all the dependencies and register the two Blocks with two distinct calls of registerBlockType():
1import { registerBlockType } from '@wordpress/blocks';
2
3import './style.scss';
4
5import OneEdit from './OneEdit';
6import TwoEdit from './TwoEdit';
7import OneSave from './OneSave';
8import TwoSave from './TwoSave';
9
10registerBlockType( 'one/multiblock', {
11 edit: OneEdit,
12 save: OneSave
13});
14registerBlockType( 'two/multiblock', {
15 edit: TwoEdit,
16 save: TwoSave
17});The CSS of the stylesheet src/style.scss that controls the appearance of the blocks both in the Gutenberg editor and in the front of the website doesn't have to necessarily set itself apart from the code generated by the @wordpress/create-block package, after all Multiblock is just an exemplification, so we are going to modify it just so as the CSS rules it contains will be applied to the markup of our two blocks:
1.wp-block-one-multiblock,
2.wp-block-two-multiblock {
3 background-color: #21759b;
4 color: #fff;
5 padding: 2px;
6}A Final Step, and We Are Done
At this point, we are almost ready to launch the build script. What it's left to do is to let WordPress' back-end know about our two Blocks. This translates into registering the two Blocks using the metadata stored into our custom block.json files. So, in the multiblock.php file, update create_block_multiblock_block_init() as follows:
1function create_block_multiblock_block_init() {
2 register_block_type( __DIR__ . '/config/one-block.json' );
3 register_block_type( __DIR__ . '/config/two-block.json' );
4}
5add_action( 'init', 'create_block_multiblock_block_init' );Now we can head straight toward the Terminal application where we will navigate to wp-content/plugins/multiblock and launch the build script like this:
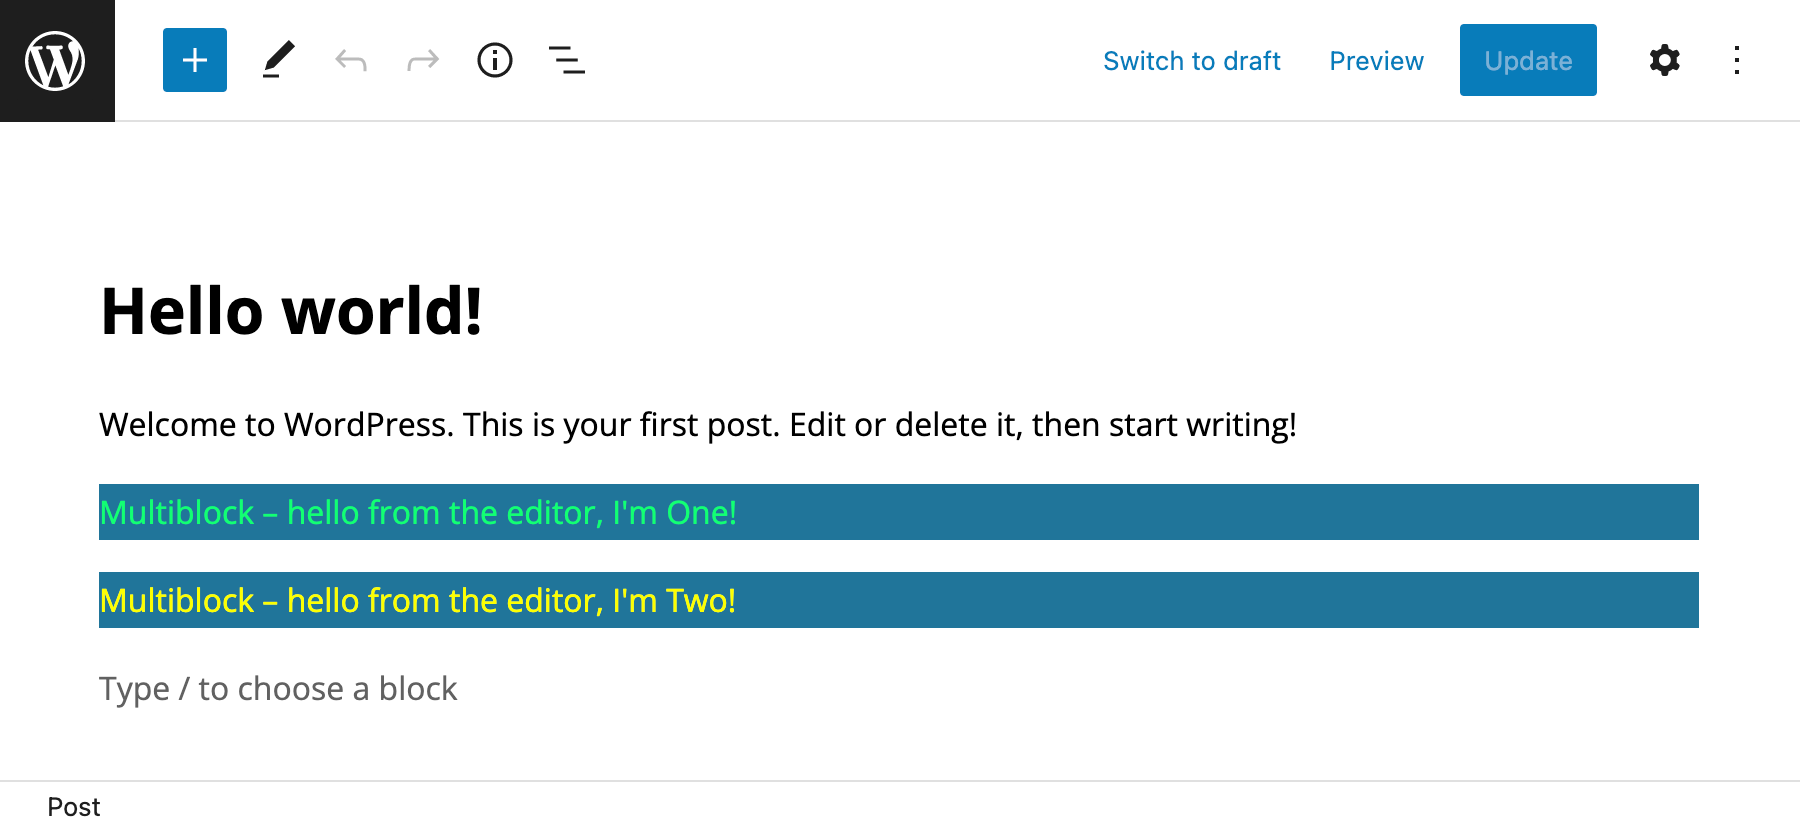
1$ npm run buildThe plugin is finally ready to be activated from the WordPress Admin area, and tested of course! If you try to insert the two Blocks ('Multiblock - One' and 'Multiblock - Two') into a post for instance, the Gutenberg Editor should display something very close to this: